7. Array Commands
7.1 Creating an Array Project
7.2 Training
7.3 Recognition
7.4 Test Run
In this chapter, we will create a simple project for the shifter problem, which will use Arrays instead of Files. The commands for Arrays are:
public void setN ( int n)The training commands will be used for both Binary and Polytomous neurons. This following example is also in c:\polyapplet63\chap7\.
public int getN ( )
public bool train ( char a[] )
public bool retrain ( char a[] )
public long Recognition_classification1N1C(char[] b)
public long Recognition_distribution1N1C (char[] b)
public long polyRecognition_classification1N1C(char[] b)
public long polyRecognition_distribution1N1C (char[] b)
The Array commands have one advantage over the File commands of chapter 4 to chapter 6. The multi-valued neurons are of the �char� type, meaning 16 bits. Anything less than or equal to �0� (48) is considered as the ground state and anything above �0� is an excited state. The File commands only take 10 different values: 0, 1, 2, �, 9. The Array commands can take far more than 10 values; and the possible values are �0� (ground state), �1�, �2�, �, 255.
1. Create a form and add 5 objects:
Object.Property ValueThe Data button will display the data:
------------------------------------------------
Label1.Text "Chap 7 example"
richTextBox1.scrollBars 3 (Both)
button1.Text Data
button2.Text Train
button3.Text Recognition
Training:
0 1 0
1 0 0 0 0 0 0 0 0 0 0 0 0 0 0
1 0 0 0 0 0 0 0 0 0 0 0 0 0 0
1 0 0
0 1 0 0 0 0 0 0 0 0 0 0 0 0 0
1 0 0 0 0 0 0 0 0 0 0 0 0 0 0
1 0 0
0 1 0 0 0 0 0 0 0 0 0 0 0 0 0
1 0 0 0 0 0 0 0 0 0 0 0 0 0 0
Recognition:
x x x
0 0 0 0 0 0 0 1 0 0 0 0 1 0 0
0 0 0 0 0 0 1 0 0 0 0 1 0 0 0
x x x
0 0 0 0 0 0 1 0 1 0 0 1 0 0 0
0 0 0 0 0 0 1 0 1 0 0 1 0 0 0
x x x
0 0 0 0 0 0 1 0 1 0 0 1 0 0 0
0 0 0 0 0 0 1 0 1 0 0 1 0 0 0
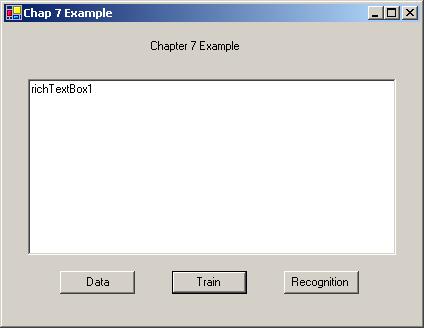
Figure 7.1 Chap 7 Example.
2. Load PolyApplet Class Library:
To use the class library, Attrasoft.PolyApplet63:
(a) Add a �using� statement:Now class library, Attrasoft.PolyApplet63, is ready to be used.
using Attrasoft.PolyApplet63;(b) In the Solution Explorer, right click References and select Add Reference.
(c) Use the Browse button to find PolyApplet63.dll; Highlight the library under �Selected Components:� and click the OK button.
(d) Run the project.
3. Add PolyApplet Object to your project:
First we declare the object,
public PolyApplet63 x;Add the following to create the object, x:
public Form1()4. Add Data to the project by declaring the following 6 integer arrays:{
InitializeComponent();
x = new PolyApplet63 (richTextBox1 );
}
char [] trn1 = { '0' , '1' , '0' , '1' , '0' , '0' , '0' , '0' , '0'
, '0' , '0' , '0' , '0' , '0' , '0' , '0' , '0' , '0' , '1' , '0' , '0'
, '0' , '0' , '0' , '0' , '0' , '0' , '0' , '0' , '0' , '0' , '0' , '0'
};
char [] trn2 = { '1' , '0' , '0' , '0' , '1' , '0' , '0' , '0' , '0'
, '0' , '0' , '0' , '0' , '0' , '0' , '0' , '0' , '0' , '1' , '0' , '0'
, '0' , '0' , '0' , '0' , '0' , '0' , '0' , '0' , '0' , '0' , '0' , '0'
};
char [] trn3 = { '0' , '0' , '1' , '1' , '0' , '0' , '0' , '0' , '0'
, '0' , '0' , '0' , '0' , '0' , '0' , '0' , '0' , '0' , '0' , '1' , '0'
, '0' , '0' , '0' , '0' , '0' , '0' , '0' , '0' , '0' , '0' , '0' , '0'
};
char [] reg1 = { 'x' , 'x' , 'x' , '0' , '0' , '0' , '0' , '0' , '0'
, '0' , '1' , '0' , '0' , '0' , '0' , '1' , '0' , '0' , '0' , '0' , '0'
, '0' , '0' , '0' , '1' , '0' , '0' , '0' , '0' , '1' , '0' , '0' , '0'
};
char [] reg2 = { 'x' , 'x' , 'x' , '0' , '0' , '0' , '0' , '0' , '0'
, '1' , '0' , '1' , '0' , '0' , '1' , '0' , '0' , '0' , '0' , '0' , '0'
, '0' , '0' , '0' , '1' , '0' , '1' , '0' , '0' , '1' , '0' , '0' , '0'
};
char [] reg3 = { 'x' , 'x' , 'x' , '0' , '0' , '0' , '0' , '0' , '0'
, '1' , '0' , '1' , '0' , '0' , '1' , '0' , '0' , '0' , '0' , '0' , '0'
, '0' , '0' , '0' , '0' , '1' , '0' , '1' , '0' , '0' , '1' , '0' , '0'
};
The PolyApplet uses char arrays. The neuron ground state is �0� and the neuron excited states are �1�, �2�, � This code first assigns the data to trn1, trn2, trn3, reg1, reg2, and reg3. After the assignment, trn1 will be:
0 1 0Remember that the PolyApplet will use characters, not integers; therefore, we must convert an integer 0 into a character �0�.
1 0 0 0 0 0 0 0 0 0 0 0 0 0 0
1 0 0 0 0 0 0 0 0 0 0 0 0 0 0
1. To check the data, click the Data button and enter the code below:
richTextBox1.Text = "Training:\n";
int i = 0;
for ( i = 0 ; i < trn1.Length ; i ++ )
{
if ( (i == 3) || (i == 18) )
richTextBox1.AppendText ("\n\t");
richTextBox1.AppendText ("" + trn1[i] );
}//for
�This button will print the 6 arrays.
2. To set up and train the neural net, click the Train button and
enter the code below:
private void button2_Click(object sender, System.EventArgs e)Note:
{
richTextBox1.Text = "";
x.setN (33);
x.setSymDimension(3, 32, 30, -1);
x.setSymmetry (1);
x.setLineBreaker(3, 18, -2, -2);x.train (trn1);
x.retrain (trn2);
x.retrain(trn3);
}
- Use Training for the first time; use Retraining from then on;
- The function, x.train (trn1), will return true if everything is ok, otherwise, it will return false.
x.train (trn1)then, the second training will overwrite the first training, and the third training will overwrite the second training.
x.train (trn2)
x.train (trn3)
The Recognition commands are:
public long Recognition_classification1N1C(char[] b)They accept a Recognition Array; for example,
public long Recognition_distribution1N1C (char[] b)
public long polyRecognition_classification1N1C(char[] b)
public long polyRecognition_distribution1N1C (char[] b)
xxx 000000010000100and convert it into,
000000100001000
100 000000010000100They also return the confidence number for the prediction. The computation result is also printed in the default file "example1c.txt".
000000100001000.
To add the recognition part to the project, click the Recognition button and enter the code below:
private void button3_Click(object sender, System.EventArgs e)
{
int i;The 3 statements:
richTextBox1.Text = "";
long i1 = x.Recognition_classification1N1C(reg1);
richTextBox1.AppendText ("\n");
long i2 = x.Recognition_classification1N1C(reg2);
richTextBox1.AppendText ("\n");
long i3 = x.Recognition_classification1N1C(reg3);
richTextBox1.AppendText ("\n");
for ( i = 0 ; i < trn1.Length ; i ++ )
{
if ( (i == 3) || (i == 18) )
richTextBox1.AppendText ("\n\t");
richTextBox1.AppendText ("" + reg1[i] );
}//for
richTextBox1.AppendText ("\t" + i1 + "\n");
reg1[0]=reg1[1]=reg1[2]='x';
�
long i1 = x.Recognition_classification1N1C(reg1);recognize the 3 patterns. Next, the following loop prints the results:
long i2 = x.Recognition_classification1N1C(reg2);
long i3 = x.Recognition_classification1N1C(reg3);
for ( i = 0 ; i < trn1.Length ; i ++ )
{
if ( (i == 3) || (i == 18) )
richTextBox1.AppendText ("\n\t");
richTextBox1.AppendText ("" + reg1[i] );
}//for
richTextBox1.AppendText ("\t" + i1 + "\n");
At this point, the Recognition-Array
xxx 000000010000100is converted into the Output-Array
000000100001000
100 000000010000100This is no longer a Recognition Array. The next statement,
000000100001000.
reg1[0]=reg1[1]=reg1[2]='x';will convert the Recognized Arrays,
100 000000010000100back to the original form,
000000100001000.
xxx 000000010000100so they can be used again.
000000100001000
1. Run the program.
2. Click the Data button to see the data.
3. Click the Train button to train the neural net.
4. Click the Recognition button to identify the 3 recognition buttons.