6. Building Attrasoft PolyNet 4.0
6.1 PolyNet 4.0 Commands
6.2 Miscellaneous Commands
6.3 Adding Examples
6.4 Test Run
6. Building Attrasoft PolyNet 4.0
In this chapter, we will create PolyNet 4.0. Most of the work was done in the last chapter. We will simply copy it as follows:
1. Create \chap5 project to \chap6 directory.
2. Rename the file name wherever necessary.
Now everything in chapter 5 is in chapter 6. Rearrange the buttons,
run the program, and Figure 6.1 will appear. We need to add several command
buttons in this chapter. This following example is also in c:\polyapplet63\chap6\.
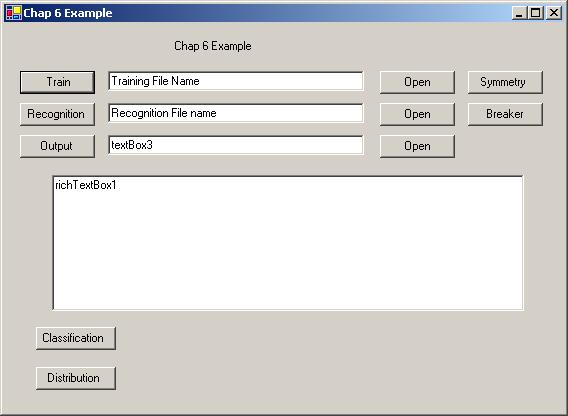
Figure 6.1 Building a PolyNet 4.0.
The Polytomous Neural Commands are:
Public bool polyClassification()Now we will add 6 buttons for the following 6 commands:
public bool polyDistribution ()
public bool polyClassification1N1C()
public bool polyDistribution1N1C ()public bool train ()
public bool retrain ()Public bool polyRecognition_classification()
public bool polyRecognition_classification1N1C()
public long polyRecognition_classification1N1C(char[] b)public bool polyRecognition_distribution ()
public bool polyRecognition_distribution1N1C ()
public long polyRecognition_distribution1N1C (char[] b)
public boole polyClassification1N1C()1. Add 6 buttons and set their properties:
public bool polyDistribution1N1C ()public bool polyTrain ()
public bool polyRetrain ()Public bool polyRecognition_classification()
public bool polyRecognition_distribution ()
Object.Property Value2. Add the code:
------------------------------------------------
button11.Text "1N1C Classification"
button12.Text "1N1C Distribution"
button13.Text "Train"
button14.Text "Retrain"
button15.Text "Rec/Classification"
button16.Text "Rec/Distribution"
private void button7_Click(object sender, System.EventArgs e)
{if ( ! x.polyClassification () )}
{
richTextBox1.AppendText ( "Classification fails!\n");
return;
}
x.openOutputFile ();
private void button8_Click(object sender, System.EventArgs e)
{if ( ! x.polyDistribution () )}
{
richTextBox1.AppendText ( "Classification fails!\n");
return;
}
x.openOutputFile ();
private void button9_Click(object sender, System.EventArgs e)Run the program, and Figure 6.2 will appear.
{Form2 symmetryForm = new Form2 (this );}
symmetryForm.ShowDialog ();private void button10_Click(object sender, System.EventArgs e)
{Form3 breakerForm = new Form3 (this );}
breakerForm.ShowDialog ();private void button11_Click(object sender, System.EventArgs e)
{if ( ! x.polyClassification1N1C () )}
{
richTextBox1.AppendText ( "Classification fails!\n");
return;
}
x.openOutputFile ();private void button12_Click(object sender, System.EventArgs e)
{if ( ! x.polyDistribution1N1C () )}
{
richTextBox1.AppendText ( "Classification fails!\n");
return;
}
x.openOutputFile ();private void button13_Click(object sender, System.EventArgs e)
{if ( x.train ())}
richTextBox1.Text = "Training End!\n";private void button14_Click(object sender, System.EventArgs e)
{if ( x.retrain ())}
richTextBox1.Text = "Retraining End!\n";private void button15_Click(object sender, System.EventArgs e)
{if ( ! x.polyRecognition_classification () )}
{
richTextBox1.AppendText ( "Classification fails!\n");
return;
}
x.openOutputFile ();private void button16_Click(object sender, System.EventArgs e)
{if ( ! x.polyRecognition_distribution () )}
{
richTextBox1.AppendText ( "Classification fails!\n");
return;
}
x.openOutputFile ();
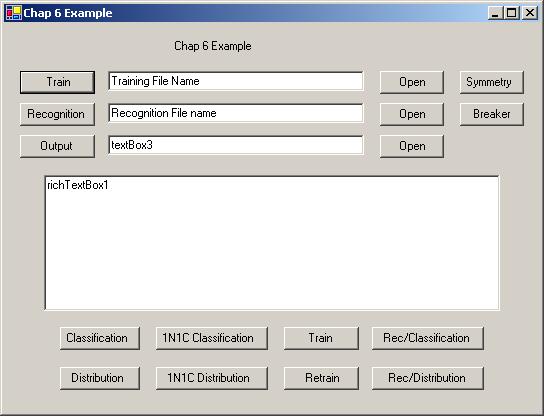
Figure 6.2 Building a PolyNet 4.0.
Other commands that can be added to the project include:
- Binary Neuron Commands
- Miscellaneous Commands
- Examples
Open a help file:
x.setHelpFile ("abm64.doc"); // enter any file nameGo home:
x.openHelpFile();
//abm64.doc is this document. Use your file in your project.
x.GoToHome ("http://attrasoft.com" );Test Input files:
// http://attrasoft.com can be replaced by your home page.
x.testInput();About:
Create a Dialog box, which will give the "About" information.Clear Rich Text Box:
RichTextBox1.text = ��We will now implement the "Test Input" button.
1. Add a button and set their property:
Object.Property Value
------------------------------------------------
button17.text "Test Input"
2. Add the following:
private void button17_Click(object sender, System.EventArgs e)
{
x.testInput ();
}
The basic commands are given in chapter 3. There are many ways to add examples to your project. We will choose a ComboBox.
1. Double click a ComboBox and set comboBox1.Text to "Examples".
2. Add items to the comboBox1: double click Form1 and enter the code below:
private void Form1_Load(object sender, System.EventArgs e)
{Each example consists of:
comboBox1.Items.Add ("Shifter");
comboBox1.Items.Add ("Double Shifter");
comboBox1.Items.Add ("Triple Shifter");
comboBox1.Items.Add ("Quadraple Shifter");
comboBox1.Items.Add ("Segment Counter");comboBox1.Items.Add ("5x7 Character Recognition");
comboBox1.Items.Add ("8x8 Character Recognition");
comboBox1.Items.Add ("19x19 Character/1023 class");
comboBox1.Items.Add ("32x32 Character/127 class");
}
- Training file
- Recognition file
- Symmetry and Breaker settings
public intline2Start = -1,
line3Start = -1,
line4Start = -1,
line5Start = -1;
public intsymmtryStart = -1,public String trainFileName = "example1a.txt";
symmtryEnd = -1,
symmtrXDim = -1,
symmtryYDim = -1,
symmetryIndex = 0;
public String recognitionFileName ="example1b.txt";
public String outputFileName = "example1c.txt";
If you call a function, say x.example.shifter1(), then these variables
will hold the parameters for the Shifter problem. You have to link the
files to the PolyNet, and set the symmetry and line-breakers.
3. Add examples to the PolyNet: double click comboBox1 and the code:
private void comboBox1_SelectedIndexChanged(object sender, System.EventArgs e)Run the program, and Figure 6.3 will appear.
{if (comboBox1.SelectedIndex == 0)
x.example.shifter1();
else if (comboBox1.SelectedIndex == 1)
x.example.shifter2();
else if (comboBox1.SelectedIndex == 2)
x.example.shifter3();
else if (comboBox1.SelectedIndex == 3)
x.example.shifter4();
else if (comboBox1.SelectedIndex == 4)
x.example.segmentCounter();
else if (comboBox1.SelectedIndex == 5)
x.example.ocr5x7();
else if (comboBox1.SelectedIndex == 6)
x.example.ocr8x8();
else if (comboBox1.SelectedIndex == 7)
x.example.ocr19x19();
else if (comboBox1.SelectedIndex == 8)
x.example.ocr32x32();int x1, x2, x3, x4;
x1 = x.example.line2Start;
x2 = x.example.line3Start;
x3 = x.example.line4Start;
x4 = x.example.line5Start;
x.setLineBreaker(x1, x2, x3, x4);x1 = x.example.symmtryStart ;
x2 = x.example.symmtryEnd ;
x3 = x.example.symmtrXDim ;
x4 = x.example.symmtryYDim ;
x.setSymDimension(x1, x2, x3, x4);x1 = x.example.symmetryIndex;
x.setSymmetry (x1);
x.setTrainFile (x.example.trainFileName);
x.setRecognitionFile (x.example.recognitionFileName);textBox1.Text = x.example.trainFileName ;
textBox2.Text = x.example.recognitionFileName;}

Figure 6.3 Building a PolyNet 4.0.
To test:
1. Run the program.
2. In the pushdown list, select "Shifter".
3. Run: click the "Classification" button to complete the neural computation.
xxx
070700007077070
707000070770700
400
070700007077070
707000070770700 144 1
xxx
022002000020000
022002000020000
020
022002000020000
022002000020000 640 1
4. In the comboBox1, select a different example.
5. Run: click the "Classification" button to complete the neural computation.