In this chapter, we will create a simple version of ABM 2.7. We assume the users are familiar with Attrasoft software, ABM 2.7; otherwise, you should start with ABM 2.7. The program will only solve the shifter problem (See ABM 2.7).
The minimum requirements for a pattern recognition problem are:
- File Assignment (Training, Recognition, and Output)
- Open Files (Training, Recognition, and Output)
- Running Commands (Distribution, Classification)
- RichTextBox Message Window
To create a new project:
1. Start the Visual Studio .Net, (see Figure 4.1).
2. Click File è New è Project command. The New Project dialog box is displayed (Figure 4.2).
3. Highlight the Visual C# project folder in the Project Type list to display the Templates that are available for C#. Then, highlight Windows Application Template.
4. Enter a name for the project and select the location for the project. A folder with the same name as the project is automatically added to the location you specify.
5. Click the OK button to start the new project (Figure 4.3).
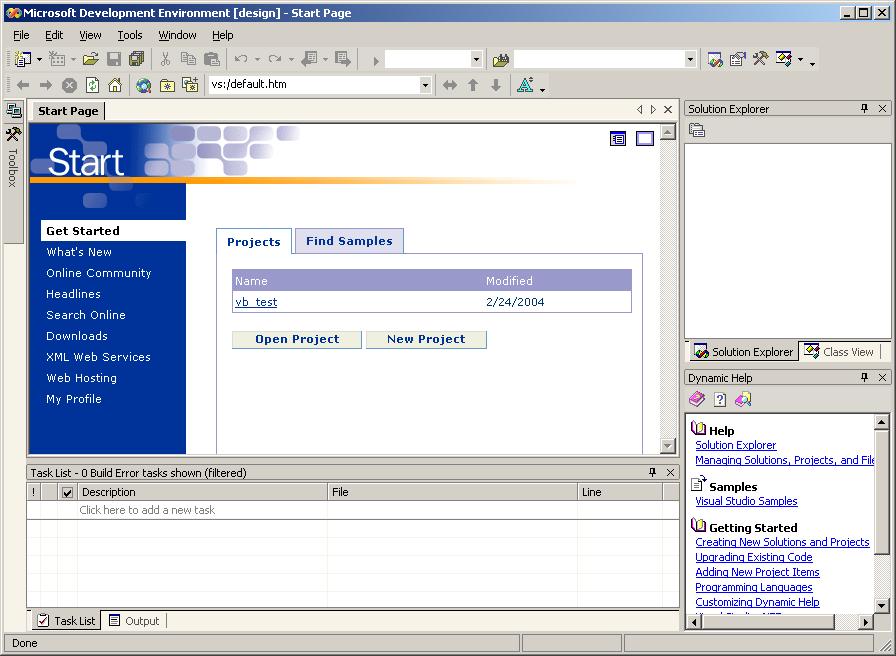
Figure 4.1 Starting .Net.
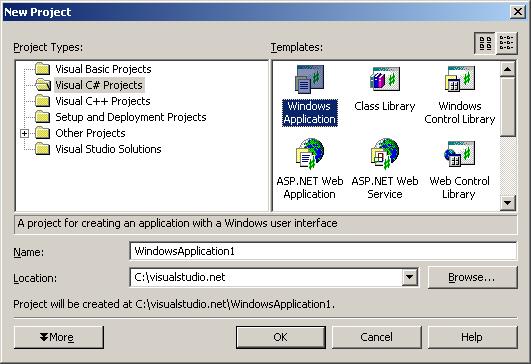
Figure 4.2 Selecting Project Type and Template.
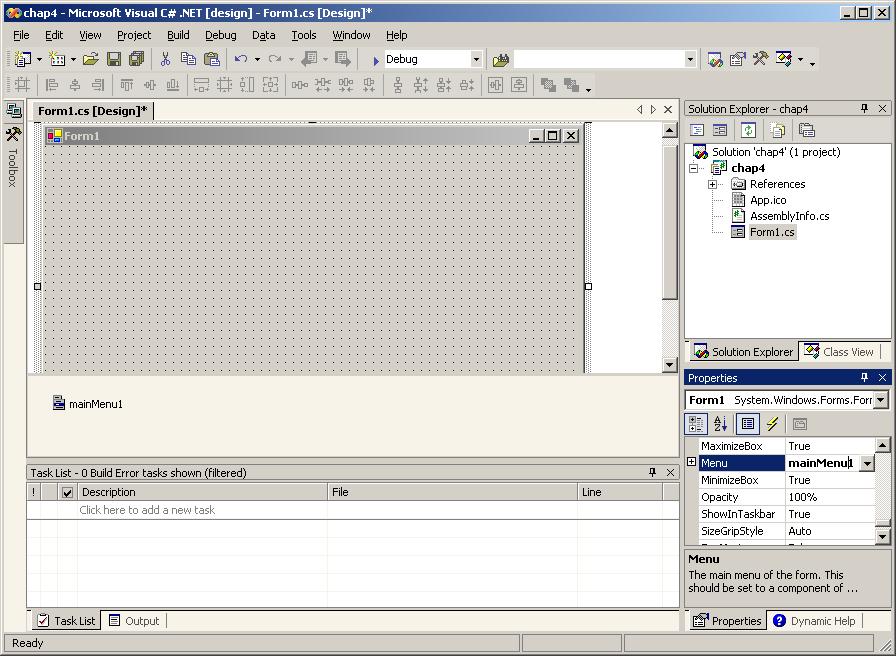
Figure 4.3 Creating a form.
The first step is to link data files to the project. In this section, we will link the training file. This will take several steps:
1. Add a Label, Label1: Go to the Property Window; and change the property, Label1.Text, to "Chap 4 Example";
2. Add the following 3 objects to the form:
Control Object Description
-------------------------------------------------
Button button1 click to start an open-file-dialog
TextBox textBox1 training file name
Button button2 open training fileGo to the Property Window and set:
Object.Property Value
------------------------------------------------
button1.Text "Train"
textBox1.Text "Training File Name"
button2.Text "Open"
label1.Text �Chap 4 example�
3. Run the program and you will see Figure 4.4.
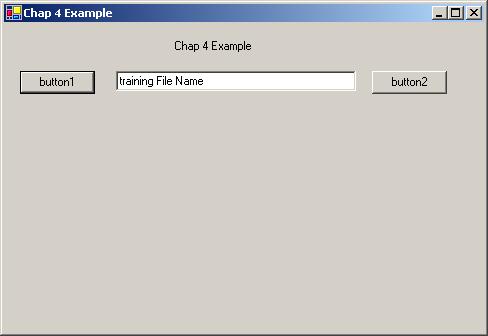
Figure 4.4 The form after 3 steps.
4. To add an OpenFileDialog, select it from the tool box.
To open the dialog box, click button1 to add:5. Add RichTextBox:if ( openFileDialog1.ShowDialog () != DialogResult.OK )
return;
textBox1.Text = openFileDialog1.FileName ;Now click textBox1, and add:
private void textBox1_TextChanged(object sender, System.EventArgs e)
{
x.setTrainFile (textBox1.Text);
}This will link the selected file to object, x. Run the program again; the button1 is fully operational now. Next we will implement the Open button, which will open the training file. To do this, you must load Attrasoft PolyApplet now.
The RichTextBox will be required by the PolyApplet, so we will add it now:6. Load PolyApplet Class Library:Click �RichTextBox� from Toolbox;
To use the class library, Attrasoft.PolyApplet63:7. Add PolyApplet Object to your project:(1) Add a �using� statement:
using Attrasoft.PolyApplet63;(2) In the Solution Explorer, right click References and select Add Reference.
(3) Use the Browse button to find PolyApplet63.dll; Highlight the library under �Selected Components:� and click the OK button.
(4) Run the project.Now class library, Attrasoft.PolyApplet63, is ready to be used.
First we declare the object,public Attrasoft.PolyApplet63.PolyApplet63 x;Add the following to create the object, x:public Form1()Now we will link the training file, selected by the open file dialog, to the PolyApplet.
{
InitializeComponent();
x = new PolyApplet63 (richTextBox1 );
}
8. Open button: this button will open the training file. Double
click the Open button; and add the following code:
private void button2_Click(object sender, System.EventArgs e)Now we have completed the work for the training file. The default folder is:
{
x.openTrainFile ();
}C:\polyapplet63\chap4\bin\Debug\.This folder has the following files:Example1a.txtIf you use a different folder, copy the following file from CD:\transapplet63\chap4\bin\Debug\ to your project directory. Run the program, and Figure 4.5 will appear.
Example1b.txt
Shifter1a.txt
Shifter1b.txt
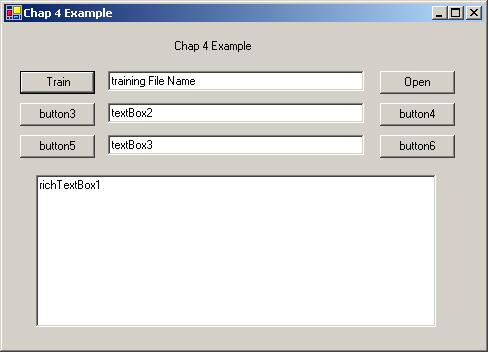
Figure 4.5 This is the form after completing the training
file link.
Click the "Train" button on Figure 4.5, and Figure 4.6 will appear.

Figure 4.6 Click the "Train" button.
Double click file, " C:\polyapplet63\chap4\bin\Debug\example1a.txt", in Figure 4.6 to select it; and click the �Open� button in Figure 4.5 to see the file in Figure 4.7.
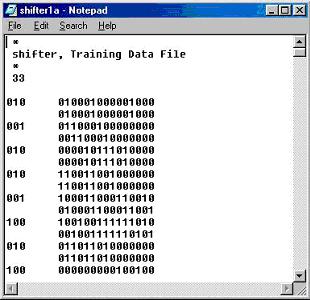
Figure 4.7 Click the "Open" button.
4.3 Recognition and Output File Assignment
Now we will link the recognition and output files.
Add the following 6 objects to the form:
Control
Object
Description
-------------------------------------------------
Button
button3
click to start an open file dialog for the recognition file
TextBox
textBox2
recognition file name
Button
button4
open recognition file
Button
button5
click to start an open file dialog for the output file
Text
texdtBox3 output
file name
Button
button6
open output file
Go to the Property Window and set:
Object.Property
Value
------------------------------------------------
button3.Text
"Recognition"
textBox2.Text
"Recognition File Name"
button4.Text
"Open"
button5.Text
"Output"
textBox3.Text
"Output File Name"
button6.Text
"Open"
Now enter the following code with the proper objects:
private void button3_Click(object sender, System.EventArgs e)
{
if ( openFileDialog1.ShowDialog () != DialogResult.OK )
return;
textBox2.Text = openFileDialog1.FileName ;
}
private void button5_Click(object sender, System.EventArgs e)
{
if ( openFileDialog1.ShowDialog () != DialogResult.OK )
return;
textBox3.Text = openFileDialog1.FileName ;
}
private void button4_Click(object sender, System.EventArgs e)
{
x.openRecognitionFile();
}
private void button6_Click(object sender, System.EventArgs e)
{
x.openOutputFile ();
}
private void textBox2_TextChanged(object sender, System.EventArgs e)
{
x.setRecognitionFile (textBox2.Text);
}
private void textBox3_TextChanged(object sender, System.EventArgs e)
{
x.setOutputFile (textBox3.Text);
}
Run the program, and Figure 4.8 will appear.
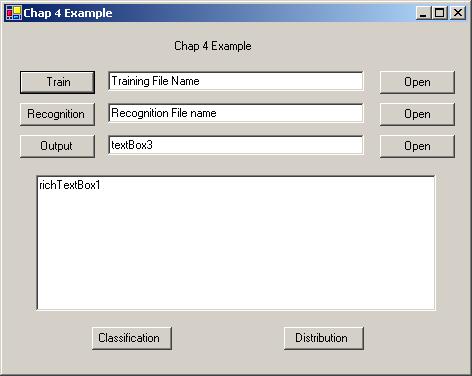
Figure 4.8 This is the form after completing the three file links.
4.4 Distribution and Classification
Before you can run your neural net, you have to set up the net, which includes three steps:
- Neural Net Size
- Symmetry
- Breaker
010 010001000001000The recognition file will look like this:
010001000001000
001 011000100000000
001100010000000
010 000010111010000
000010111010000
xxx 000000010000100The number of neurons is 33 in this case. This number is in the training file so it will be done automatically.
000000100001000
xxx 000000101001000
000000101001000
xxx 000010001001001
100001000100100
To set up the symmetry, call the function, setSymDimension (3, 32, 30, -1), meaning,
Symmetry starts at 3and call setSymmetry (1), meaning 1-D Translation symmetry.
Symmetry ends at 32
x-dimension is 30
y-dimension is -1
To set up the line breakers, call setLineBreaker (3, 18, -2, -2 ), meaning the output will be in three lines:
010Now let us add two commands to the project.
000010111010000 (line 2 starts at 3)
000010111010000 (line 3 starts at 18)
1. Add 2 buttons:
Class Object Description2. Go to the Property Window and set:
-------------------------------------------------
Button button7 Hopfield Model
Button button8 Boltzmann Machine
Object.Property Value3. Double click the buttons and enter the code:
------------------------------------------------
button7.Text "Classification"
button8.Text "Distribution"
private void button7_Click(object sender, System.EventArgs e)
{
richTextBox1.Text = "";
x.setSymDimension(3, 32, 30, -1);
x.setSymmetry (1);
x.setLineBreaker(3, 18, -2, -2);if ( ! x.classification () )
{
richTextBox1.AppendText ( "Classification fails!\n");
return;
}
x.openOutputFile ();
}
private void button8_Click(object sender, System.EventArgs e)
{Now the job is complete for the Shifter problem.
richTextBox1.Text = "";
x.setSymDimension(3, 32, 30, -1);
x.setSymmetry (1);
x.setLineBreaker(3, 18, -2, -2);if ( ! x.distribution () )
{
richTextBox1.AppendText ( "Classification fails!\n");
return;
}
x.openOutputFile ();
}
To test:
1. Run the program, and Figure 4.9 will appear:
Figure 4.9 A simple ABM 2.7.
2. Training file: the default training file is �.\example1a.txt", where �.\� is chap4.exe directory (�C:\polyapplet63\chap4\bin\Debug\�). Click the "Open" button to make sure ".\example1a.txt" is the training file for the shifter problem.
3. Recognition file: the default recognition file is ".\example1b.txt". Click the "Open" button to make sure ".\example1b.txt" is the recognition file for the shifter problem.
4. Output file: the default output file is ".\example1c.doc�.
5. Run: click the "Classification" button to complete the neural computation. To see the results, click the "Open" (output file) button and you will get:
xxx
000000010000100
000000100001000
100
000000010000100
000000100001000 2048 1
xxx
000000101001000
000000101001000
010
000000101001000
000000101001000 1216 1