15. Biometrics
15.1 Attrasoft Facial Recognition Classifications
15.2 How to Build An Image Recognition Solution With The ImageFinder
15.3 Fingerprint Data
15.4 Image Processing
15.5 BioFilter
15.6 Neural Filter
15.7 NeuralNet Filter
15.8 Improvement
Biometrics refers to Facial, Fingerprint, Voice, Palm Print, Iris Recognition, � In this chapter, we will study Face Recognition and Fingerprint Recognition. The example of Face Recognition is given in chapter 4. We will use Fingerprints as illustrations to show you how to build an image recognition solution using the ImageFinder.
15.1 Attrasoft Facial Recognition Classifications
When dealing with �Facial Recognition�, words mean different things to different people. We will first define what Facial Recognition is in terms of 5 categories.
Attrasoft divides Facial Recognition into 5 categories:
Class 1: Photo ID Recognition
- Class 1 Facial Recognition is Photo ID (Passport, Driver's license,
...) Recognition, which is semi-automatic:
- Before a passport is issued, a picture of the passport is taken and stored in a database, which has facial images and/or fingerprints;
- The computer will compare (match or deny) the stored original passport images and the newly captured passport image via the passport number as the person goes through security;
- Airport staff is responsible for comparing the passport photo with the passport holder.
- Class 1 Face Verification rate is 100%. All other face recognition is not even close to 100% verification rate.
- No face recognition system, which addresses face recognition beyond Class 2, has ever been successful.
In Class 2 Facial Recognition, the captured live image is taken by placing their chin on a chin plate while their picture is taken; their picture is then compared to the stored image taken in a similar manner. This method is considered intrusive and highly restrictive. Fingerprint, palm print, and iris recognition fall into this category.
Class 3: Low Intrusive Live Image
- Class 3 Facial Recognition has the following features:
- Non-intrusive, no physical contact is made;
- The person is asked to stand in a box area and is asked to look forward.
- Class 4 Facial Recognition has the following features:
- Non-intrusive, no physical contact is made;
- The person is asked to walk through a narrow path.
- Class 5 Facial Recognition has no restrictions:
- The person can walk through the security area and their identity can be verified or admission denied via video camera.
Generally speaking, the more restrictive the images are when taken, the higher the identification rates will be. There are various ways to improve facial recognition rates. For example, verify a passenger with two live pictures is better than one picture.
The Face Recognition example has been addressed in the FaceFinder chapter.
15.2 How to Build An Image Recognition Solution With The ImageFinder
The procedure for building a solution with the ImageFinder is fairly predictable. At a minimum, you will need to go through the following steps:
- Data
- Image Processing
- BioFilter
- Neural Filter
- NeuralNet Filter
- Improvement
Data is further divided into a development set and a test set (blind set). The blind set is usually not available for the developers. A typical development set has 1000 images and a typical test set has 1000 images. Each image in a set compares with the whole set, so 1000 images will generate 1,000,000 comparisons.Often a special type of images require a special image-processing filter, which the ImageFinder may or may not have it. If the ImageFinder does not have it, the pre-processed image can be presented to the ImageFinder. This will be the case in our fingerprint example.
BioFilter
The BioFilter provides an option called Unsupervised Learning, i.e. you can start to identify the images basically without doing anything. This should quickly give you an idea how hard the problem is. If the Unsupervised Learning basically identifies most of images correctly, then you have an easy problem; on the other hand, if the Unsupervised Learning does not work at all, you have a hard problem.Neural FilterTo use the Unsupervised Learning:
The next step is to train the BioFilter. You have to prepare the match.txt file, which lists the matching pairs. If you have done the above steps, you can continue to do the following:Click �Search Dir button� and select a directory containing the images; Click �BioFilter/Scan Images � Directory Input� to convert images into templates. Click �BioFilter/BioFilter N:N Match (Untrained)� to see the results. Click �BioFilter/BioFiloter Train (match.txt required)�; Click �BioFilter/BioFilter N:N Match (Trained)� to see the results.
Neural Filter will significantly improve the BioFilter results. The advantage of this filter is that it is very fast; the speed is 100,000 comparisons per second or more.NeuralNet Filter
NeuralNet Filter will significantly improve the Neural Filter results. The NeuralNet Filter is much slower than the Neural Filter.Improvement
- Working on the ImageFinder parameters can make improvements
on the Identification Rates. The idea is that each class has its own parameters
rather than all classes share a set of common parameters. There are three
vectors that this step deals with:
- Pixel Array;
- Template;
- Parameter Vectors.
Unlike the BioFilter and Neural Filter, the selection of a parameter vector for the Neural Net from a set of matching images is not done automatically in this version. As we have seen in the last chapter, the Parameter Advisor can make a recommendation for the parameters, but a person has to check the validity of the recommendations.
- Data
- Image Processing
- BioFilter
- Neural Filter
- NeuralNet Filter
- Improvement
Fingerprint Recognition is equivalent to Class 2 Recognition discussed in the last section, i.e. they are intrusive.
There are 56 images from 8 different persons. All fingerprint images are preprocessed with the edge filters already. Each image must be recognized 1 time and must be rejected 7 times when being compared with the other 7 different fingerprints. So there are 56 positive recognitions and 56*7 = 392 negative recognitions, giving a total of 448 tests.
The fingerprint images used in this example are very, very noisy and
this makes recognition very hard.
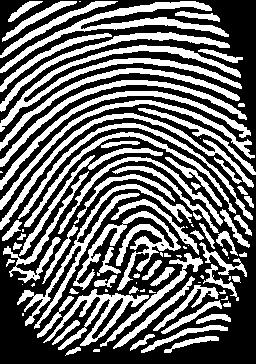
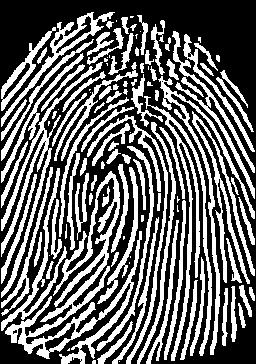
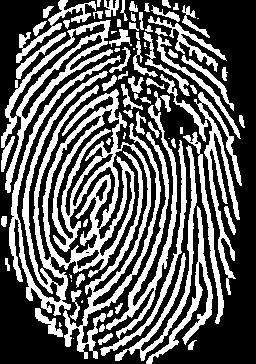
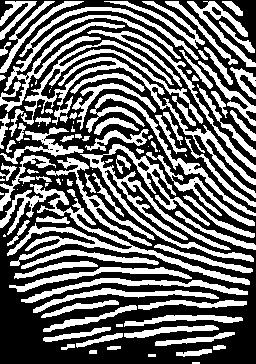
Figure 15.1 First image of 4 persons.
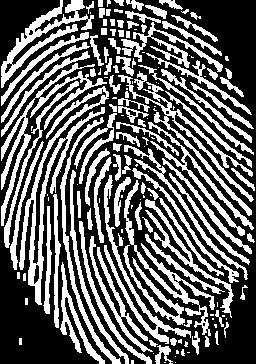

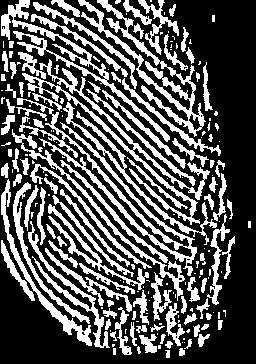
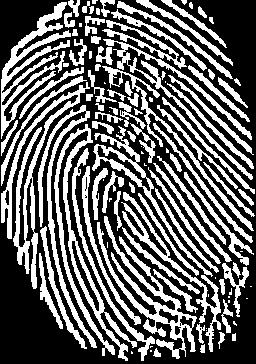
Figure 15.2 All images for person 5.
AS discussed in the last section, these images are preprocessed.
The images are already processed. We will set:
Threshold Filter: Dark Background 96;This completes image processing.
Reduction Filter Parameter:Border Cut: 5 Segment Cut: 8
We now converting an image in the input space into a vector in the feature space:
- Click �Search Dir� button and select any image in the �.\Finger\� directory to select this directory;
- Click �BioFilter/Scan Images � Directory Input� to convert.
- Click the �Parameter� button next to the BioFilter and set the �BioFilter Scale� to 50;
- Click �BioFilter/BioFilter N:N Match (Untrained)� to see the results.
101_1B.GIFThe first image in a block is the input and the rest in the block are output. Some images are classified, but there are also images that cannot be classified. We will move to the next step, train the BioFilter.
101_1B.GIF
101_2B.GIF
101_3B.GIF
101_4B.GIF
101_8B.GIF
103_3B.GIF
103_4B.GIF
103_6B.GIF
103_7B.GIF
103_8B.GIF
104_5B.GIF
107_1.GIF
107_3.GIF
107_4.GIF
107_5.GIF
107_7.GIF101_2B.GIF
101_1B.GIF
101_2B.GIF
101_3B.GIF
101_4B.GIF
101_8B.GIF
102_1B.GIF
103_3B.GIF
103_4B.GIF
103_6B.GIF
103_7B.GIF
103_8B.GIF
104_1B.GIF
104_2B.GIF
104_5B.GIF
104_6B.GIF
104_8B.GIF
107_1.GIF
107_3.GIF
107_4.GIF
107_5.GIF
107_7.GIF101_3B.GIF
101_1B.GIF
101_2B.GIF
101_3B.GIF
101_4B.GIF
101_8B.GIF
104_1B.GIF
104_5B.GIF
107_1.GIF
107_4.GIF101_4B.GIF
101_1B.GIF
101_3B.GIF
101_4B.GIF
101_8B.GIF�
Training requires a training file, match.txt. This file is already prepared; go to the ImageFinder home directory and open �finger_match.txt� to see the training file. To train the BioFilter:
- Save �.\Finger_match.txt� to �.\match.txt� (overwrite the existing file);
- Click the �Parameter� button next to the BioFilter and set the �BioFilter Scale� to 10;
- Click �BioFilter\BioFiloter Train (match.txt required)�;
- Click �BioFilter/BioFilter N:N Match (Trained)� to see the results.
The Neural Filter requires the same training file, match.txt, as the BioFilter. Since we have done this step for BioFilter, we are ready to match now:
- Click �NeuralFilter\NeuralFiloter Train (match.txt required)�;
- Click �NeuralFilter/NeuralFilter N:N Match� to see the results.
101_1B.GIF
101_1B.GIF
101_2B.GIF
101_3B.GIF
101_7B.GIF
101_8B.GIF
103_6B.GIF101_2B.GIF
101_1B.GIF
101_2B.GIF
101_3B.GIF
103_6B.GIF
104_4B.GIF
107_1.GIF
107_2.GIF
107_3.GIF
107_4.GIF
107_5.GIF101_3B.GIF
101_1B.GIF
101_2B.GIF
101_3B.GIF
101_4B.GIF
101_7B.GIF
101_8B.GIF101_4B.GIF
101_3B.GIF
101_4B.GIF
101_5B.GIF
101_7B.GIF
101_8B.GIF�
The first image in a block is the input and the rest in the block
are output. More images are classified compared to the BioFilter, but there
are also images that cannot be classified. We will move to the next step,
train the Neural Net.
We will continue the example from the last section. We will set the NeuralNet Parameters:
Segment: 90 90 120 120The output of the last section is b1.txt. This will be the input of this section:
Sensitivity: 75
Blurring: 15
Cutoff: 23900
Segment Size: Small Segment
Internal Weight Cut: 15
- Click the �File Input� button and select b1.txt;
- Click �NeuralNet/1:N File Search�.
- Click �Example/NeuralNet/Fingerprint�;
- Click �Batch/Run�.
Training: 101_1B.GIFThere are 56 images from 8 different persons. Each image must be recognized 1 time and must be rejected 7 times when being compared with the other 7 different fingerprints. So there are 56 positive recognitions and 56*7 = 392 negative recognitions, giving a total of 448 tests.
101_1B.GIF 32000000
101_2B.GIF 25484
101_3B.GIF 30452
---------------
Training: 101_2B.GIF
101_1B.GIF 27140
101_2B.GIF 32000000
101_3B.GIF 26744
---------------
Training: 101_3B.GIF
101_1B.GIF 31064
101_2B.GIF 29300
101_3B.GIF 32000000
101_4B.GIF 28652
101_7B.GIF 28508
101_8B.GIF 28760
�
Errors:
102_1B: 1 false acceptance;
103_7B: 3 false acceptances when 103 pretend to be 102, 104, and 106;
105_2B: 1 false acceptance when 105 pretend to be 106;
105_7B: 1 false acceptance when 105 pretend to be 102;
107_3B: 1 false acceptance;
107_7B: 1 false acceptance;
109_2B: 2 false acceptances when 109 pretend to be 102 and 106;
109_2B: 1 false acceptance;102_8B: 1 false rejection;
107_2B: 1 false rejection;
Together, there are 2 errors in positive recognition and 12 errors
in negative recognition.
Rates:
Total Number of Tests = 448Positive Recognition = 96.4 % = 54/56.
Negative Recognition = 96.9 % = 380/392 (percentage of time Software recognizes you as using the wrong ID).
False Rejection = 3.7 % = 2/56. (percentage of time software will reject the right person).
False Acceptance = 3.06 % = 12/392. (percentage of time software will identify the wrong person as being the right person).
This result is not very good, so we move to the next step, improvement.
Working on the ImageFinder parameters can make improvements on the Identification Rates. The idea is each class has its own parameters rather than all classes share a set of common parameters. It will increase the recognition rates significantly if the parameters can vary for each class of images. In practice, a batch file is associated with each class of images rather than all classes.
Unlike the BioFilter and Neural Filter, the selection of a parameter vector for the Neural Net from a set of matching images is not done automatically in this version.
In the following example, we will choose 4 parameters, which can change from fingerprint to fingerprint. There are four parameters: Segment Cut, Border Cut from the Reduction Filter, Internal Cut, and External Cut (Threshold) from the NeuralNet Filter. After a few rounds of experiments, the parameters are:
Images Parameters
101 (8,5,14,24500)
102 (8,2,14,25000)
103,4 (12,8,13,25000)
105,6,9 (12,5,13,25000)
107 (10,6,13,24500)
Basically, each class has its own parameters. To run this example:
- Click �Example/NeuralNet/Fingerprint - 1�;
- Click �Batch/Run� to get results for 101;
- Click �Example/NeuralNet/Fingerprint - 2�;
- Click �Batch/Run� to get results for 102;
- Click �Example/NeuralNet/Fingerprint - 34�;
- Click �Batch/Run� to get results for 103, 104;
- Click �Example/NeuralNet/Fingerprint - 7�;
- Click �Batch/Run� to get results for 107;
- Click �Example/NeuralNet/Fingerprint - 569�;
- Click �Batch/Run� to get results for 105, 106, 109.
Training: 101_1B.GIFRates:
101_1B.GIF 32000000
101_2B.GIF 25484
101_3B.GIF 30452
------------------------------
Training: 101_2B.GIF
101_1B.GIF 27140
101_2B.GIF 32000000
101_3B.GIF 26744
------------------------------
Training: 101_3B.GIF
101_1B.GIF 31064
101_2B.GIF 29300
101_3B.GIF 32000000
101_4B.GIF 28652
101_7B.GIF 28508
101_8B.GIF 28760
------------------------------
Training: 101_4B.GIF
101_3B.GIF 28544
101_4B.GIF 32000000
101_5B.GIF 27860
101_8B.GIF 25016
------------------------------
Training: 101_5B.GIF
101_4B.GIF 26456
101_5B.GIF 32000000
101_6B.GIF 26492
101_7B.GIF 27752
------------------------------
Training: 101_6B.GIF
101_5B.GIF 28076
101_6B.GIF 32000000
101_7B.GIF 26996
------------------------------
Training: 101_7B.GIF
101_1B.GIF 26996
101_3B.GIF 27500
101_4B.GIF 26492
101_5B.GIF 27536
101_6B.GIF 25880
101_7B.GIF 32000000
101_8B.GIF 27608
------------------------------
Training: 101_8B.GIF
101_1B.GIF 25484
101_3B.GIF 31568
101_4B.GIF 25700
101_7B.GIF 28544
101_8B.GIF 32000000
------------------------------
Total Number of Tests = 448Positive Recognition = 98.2 %
= 55/56.
Negative Recognition = 100 %
= 392/392 (percentage of time Software recognizes you as using the wrong ID).
False Rejection = 1.8 %
= 1/56 (percentage of time software will reject the right person).
False Acceptance = 0 %
= 0/392 (percentage of time software will identify the wrong person as being the right person).